


Bow-Yoho Ski Traverse
Canada / Canadian Rockies/ Banff & Yoho National Parks
6-days / 5 nights hut-to-hut ski traverse
Ski across the glaciated Continental Divide
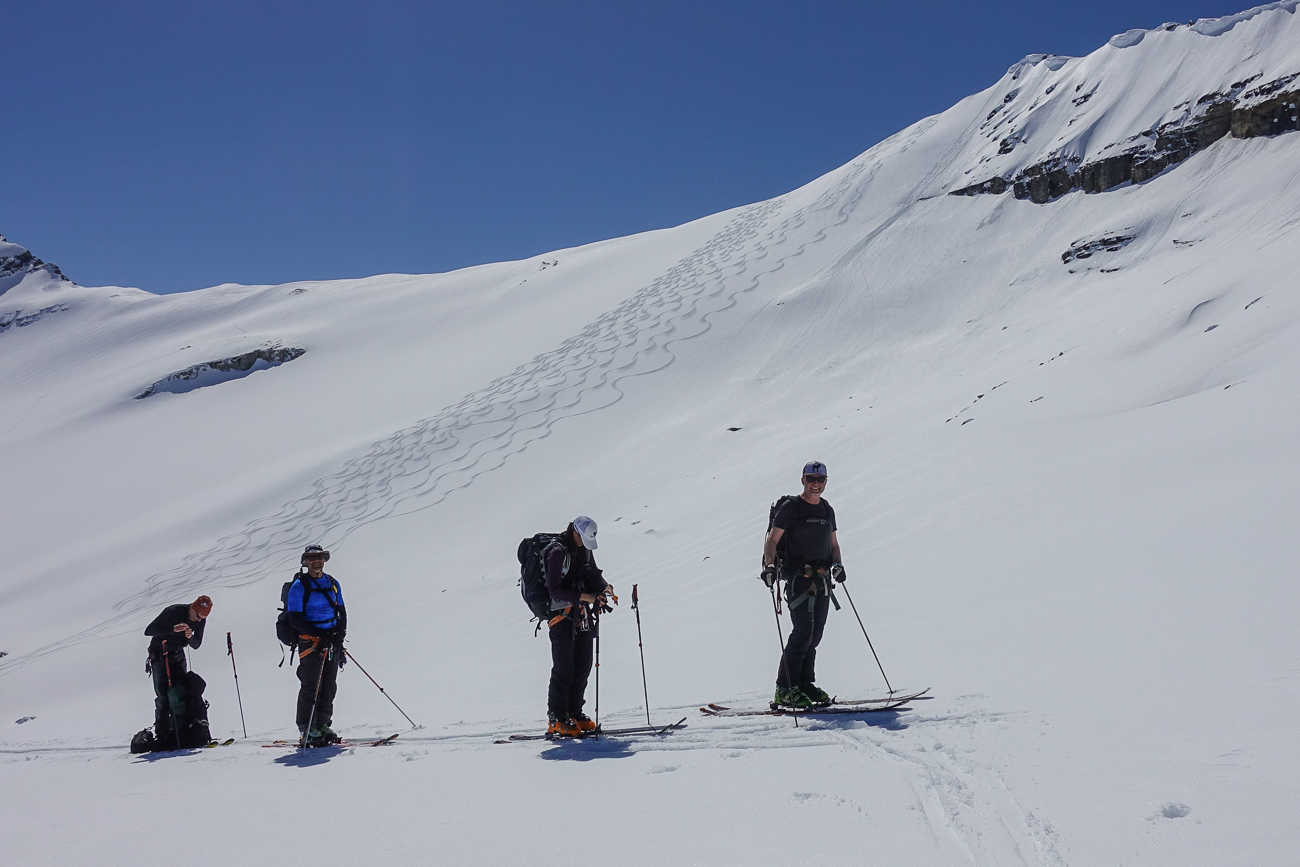
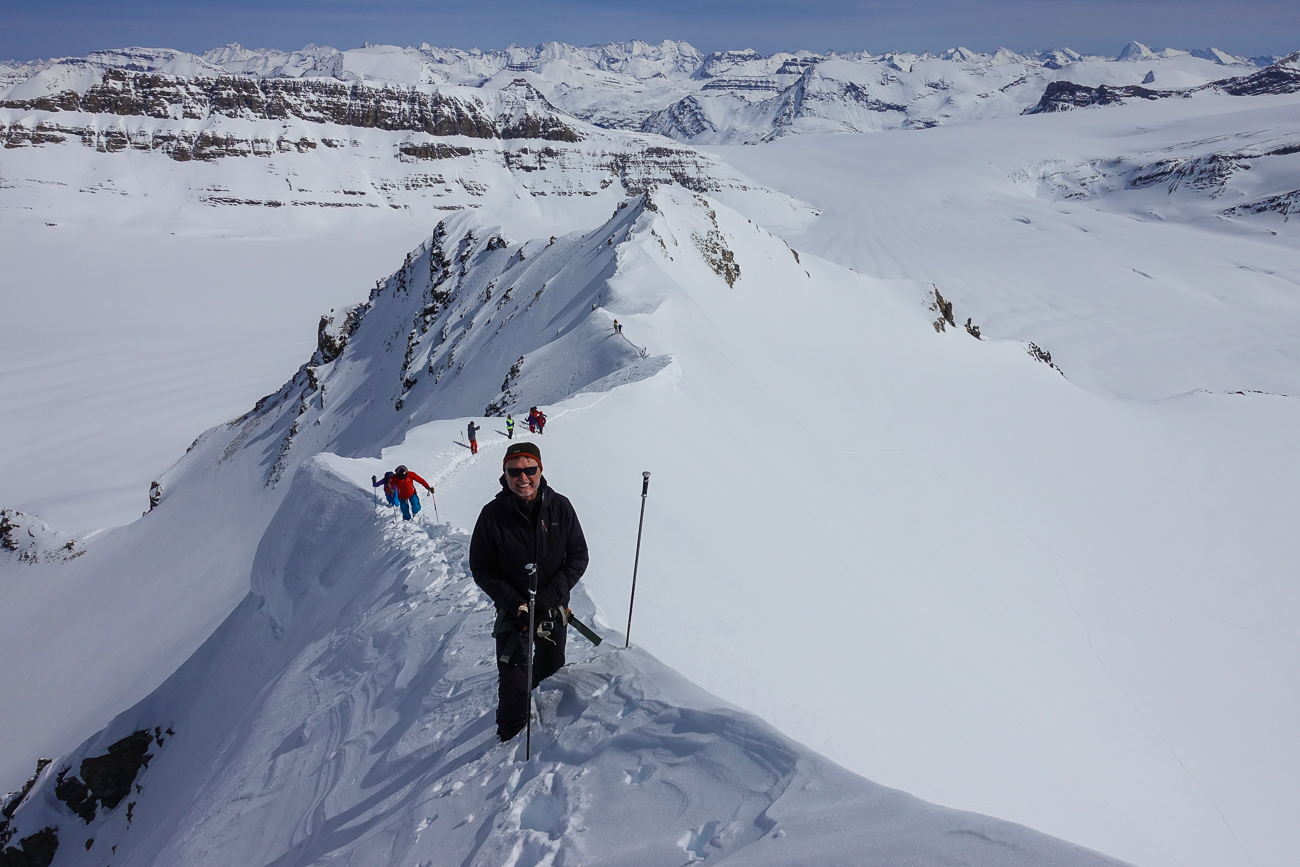
This 6-day Bow-Yoho Ski Traverse will take us deep into the spectacular backcountry of Banff and Yoho National Parks. The Bow-Yoho Ski Traverse crosses and then runs parallel to the world-famous Wapta Ski Traverse. It is a bit tougher and a bit more serious than the Wapta, but no less rewarding. The addition of the Guy Hut in 2015 made this traverse much more accessible, and it is now one of the most popular hut-to-hut ski traverses in North America.
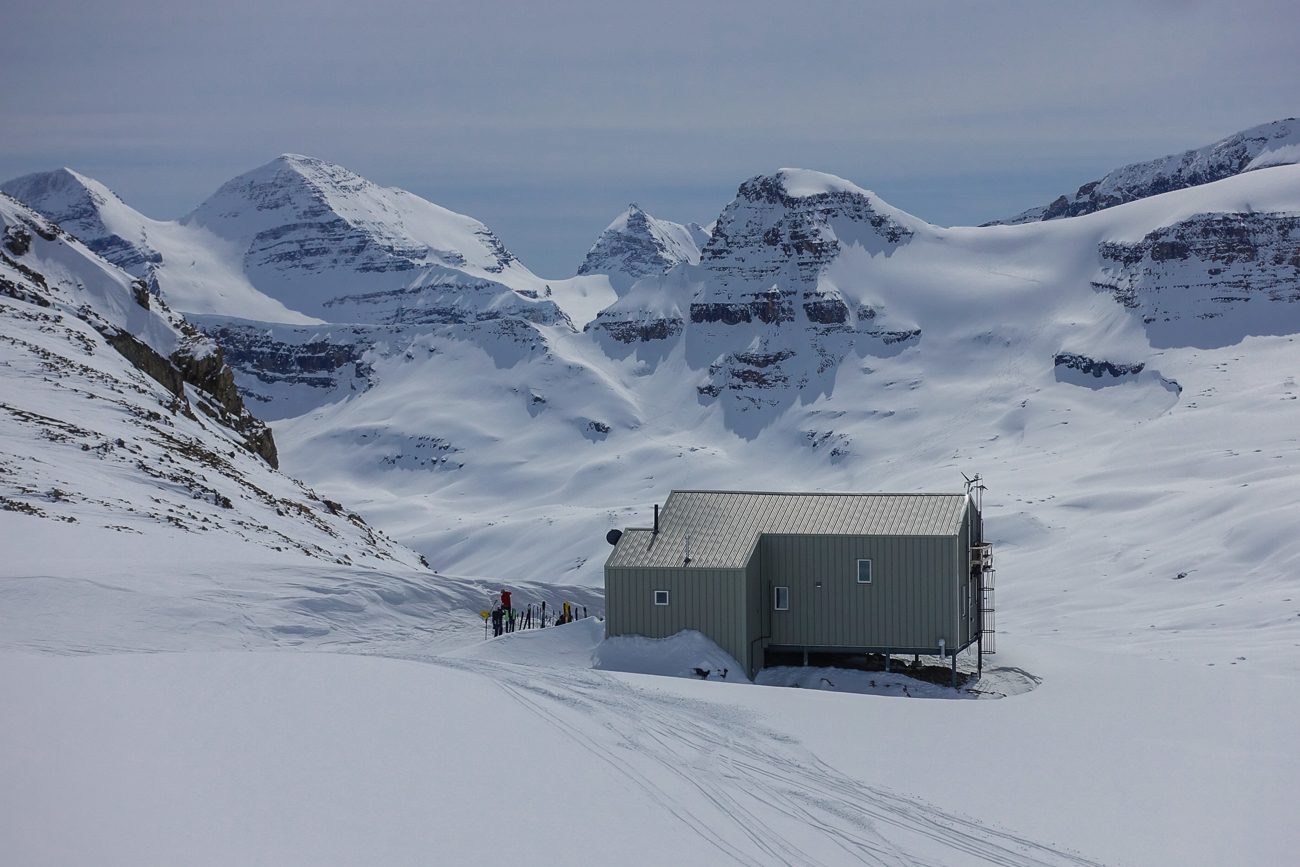
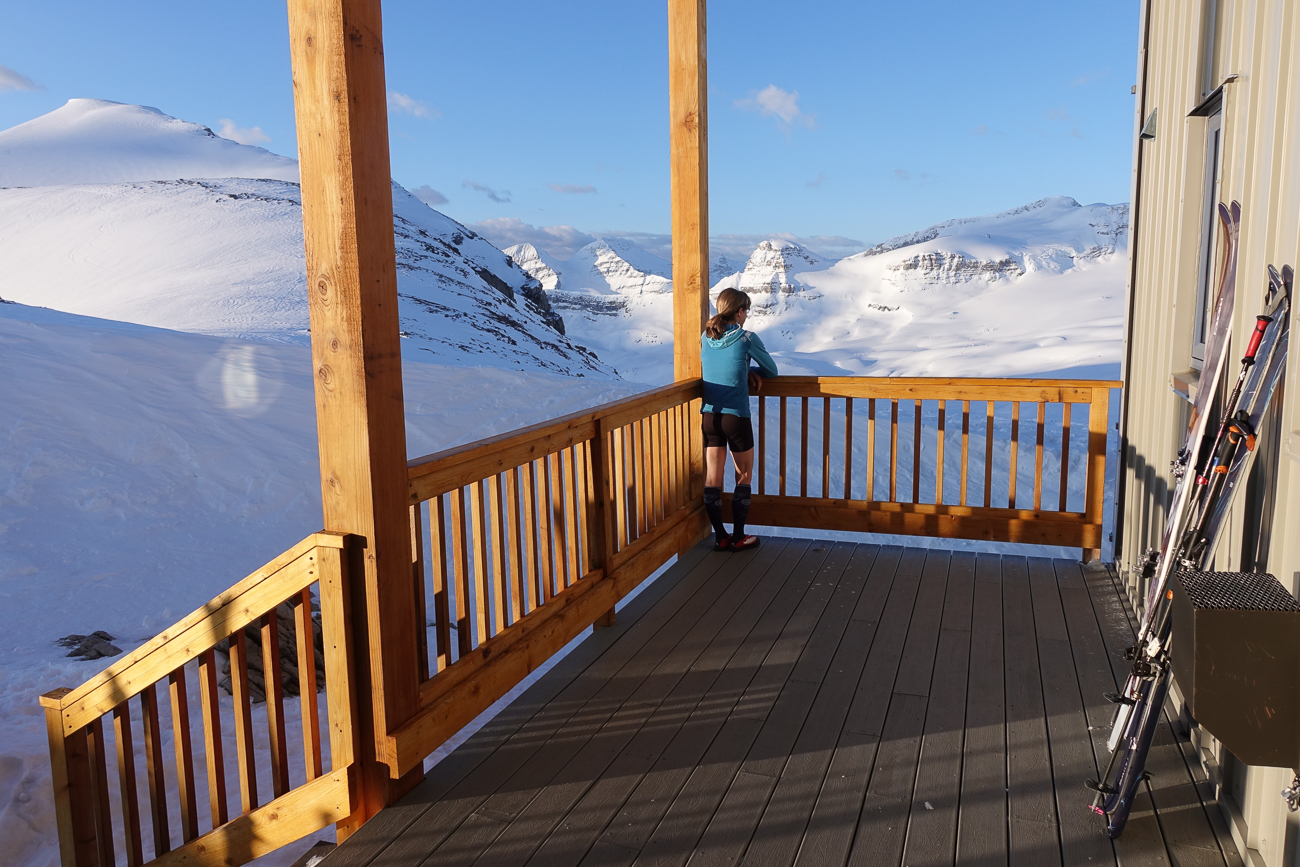
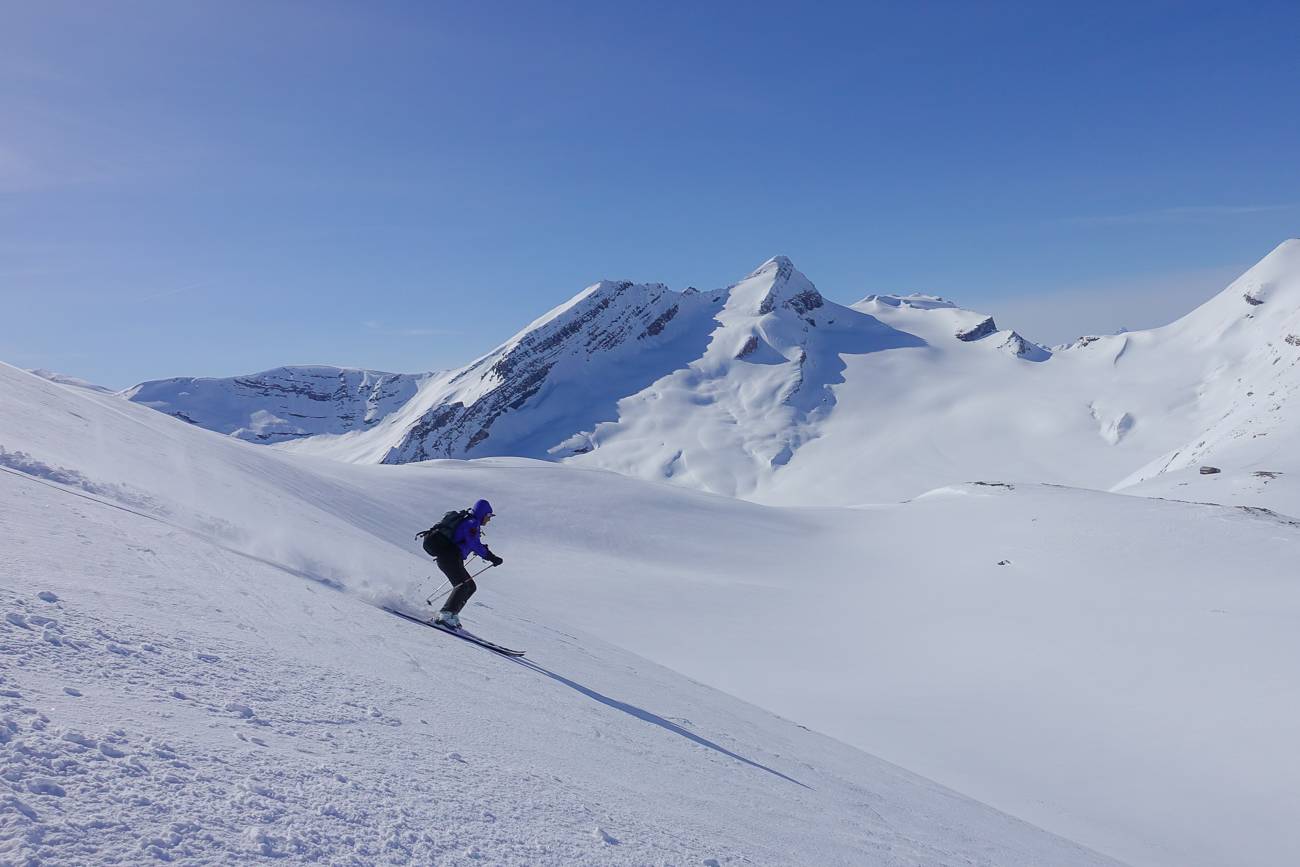
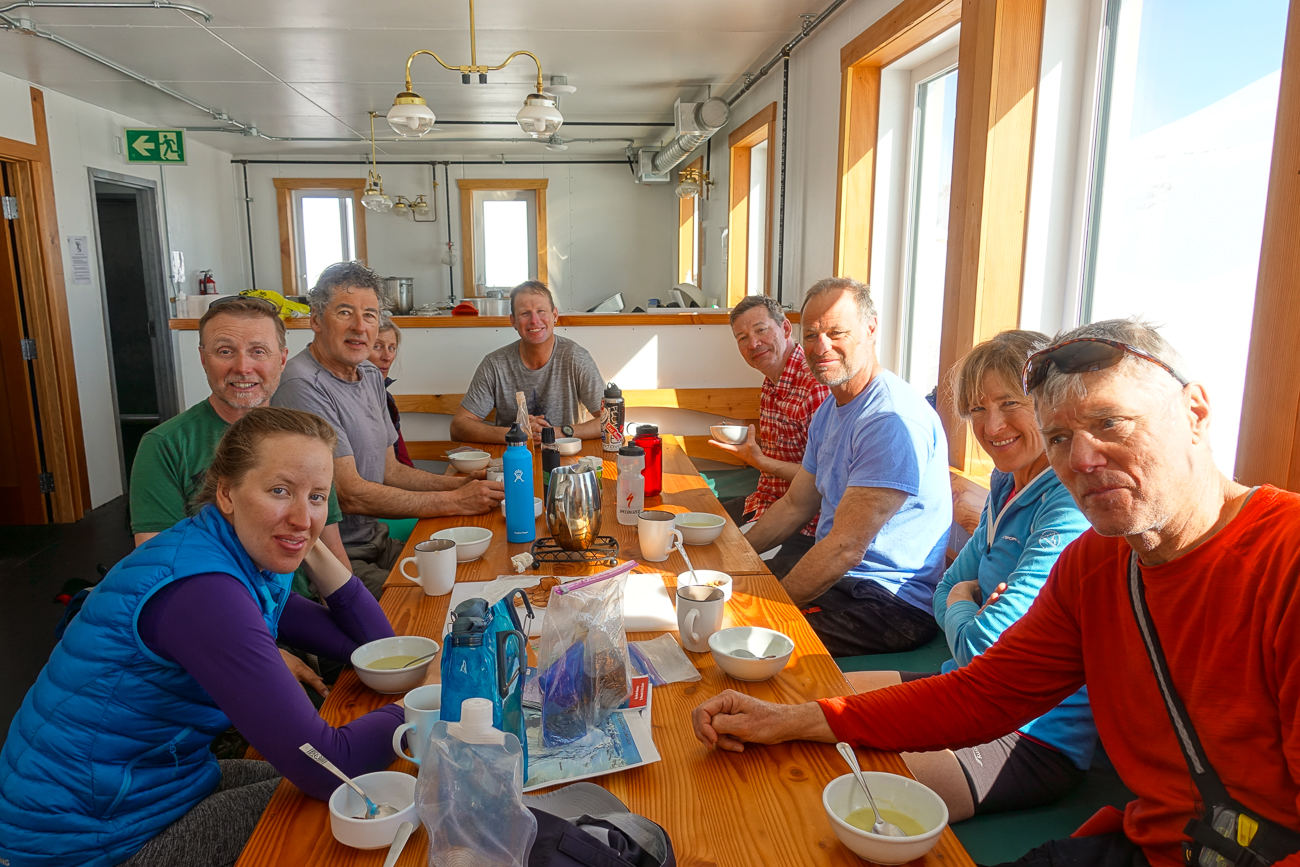
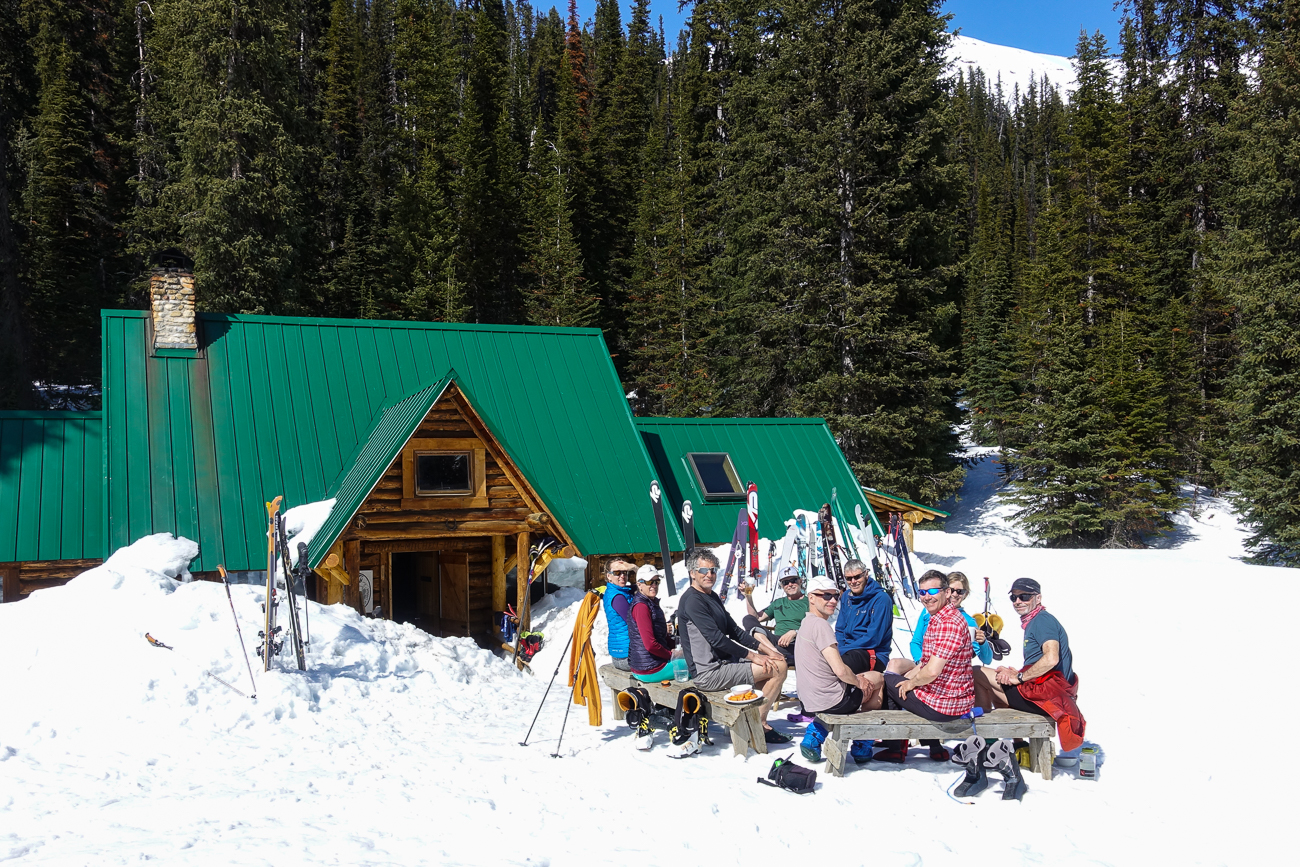
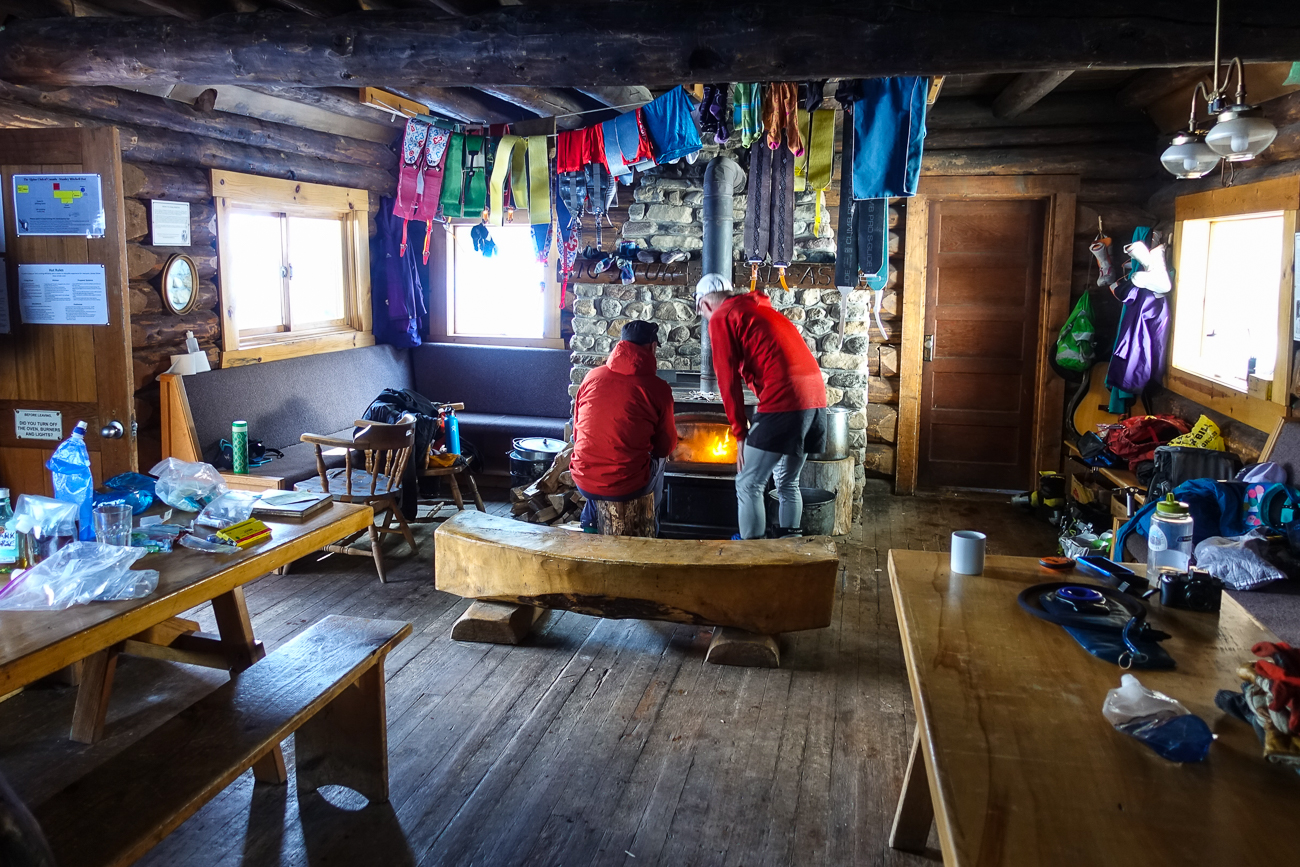
In addition to ski touring through some of the most magnificent scenery that Western Canada has to offer, there will be opportunities to ascend peaks over 3,000 meters (9,800 ft) and enjoy good skiing from their summits. We will stay at three, well-equipped Alpine Club of Canada huts as we cross the Continental Divide and border between Alberta and B.C. The huts cover three eras of adventure: the 1939 Stanley Mitchell Hut, the 1989 Bow Hut, and the 2015 Louise & Richard Guy Hut.
The Bow-Yoho Ski Traverse starts at Bow Lake, along the world-famous Icefields Parkway which connects Banff and Jasper National Parks. After five nights and six days high up on the glaciers we’ll descend back to civilization at Emerald Lake or to the Trans-Canada Highway between Lake Louise, AB and Field, B.C.
2026 Pricing
CAD $2310/ person + 5% GST
HIGHLIGHTS
- THE classic ski traverse in Canada
- Network of 4 fully equipped huts
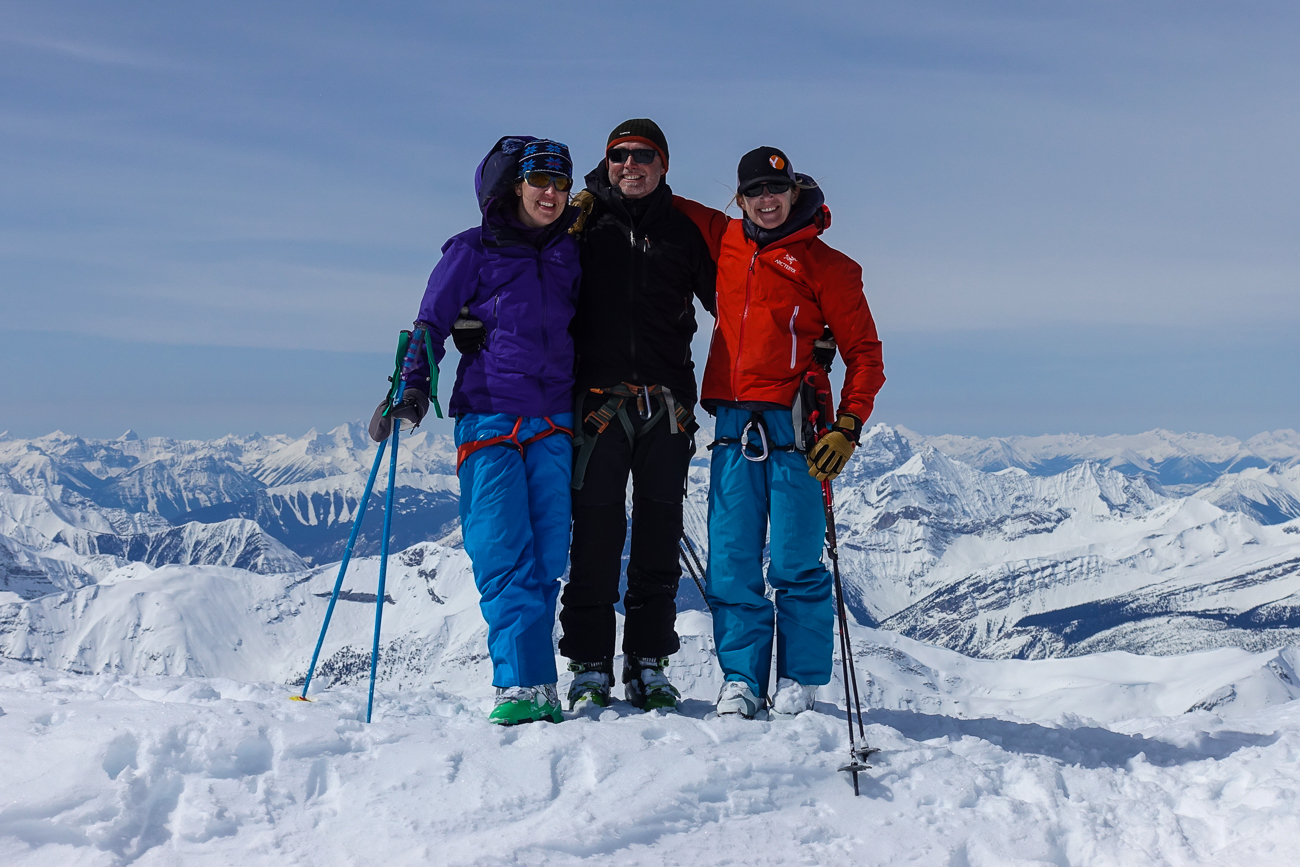
- Ascent of 5 glaciated peaks en route
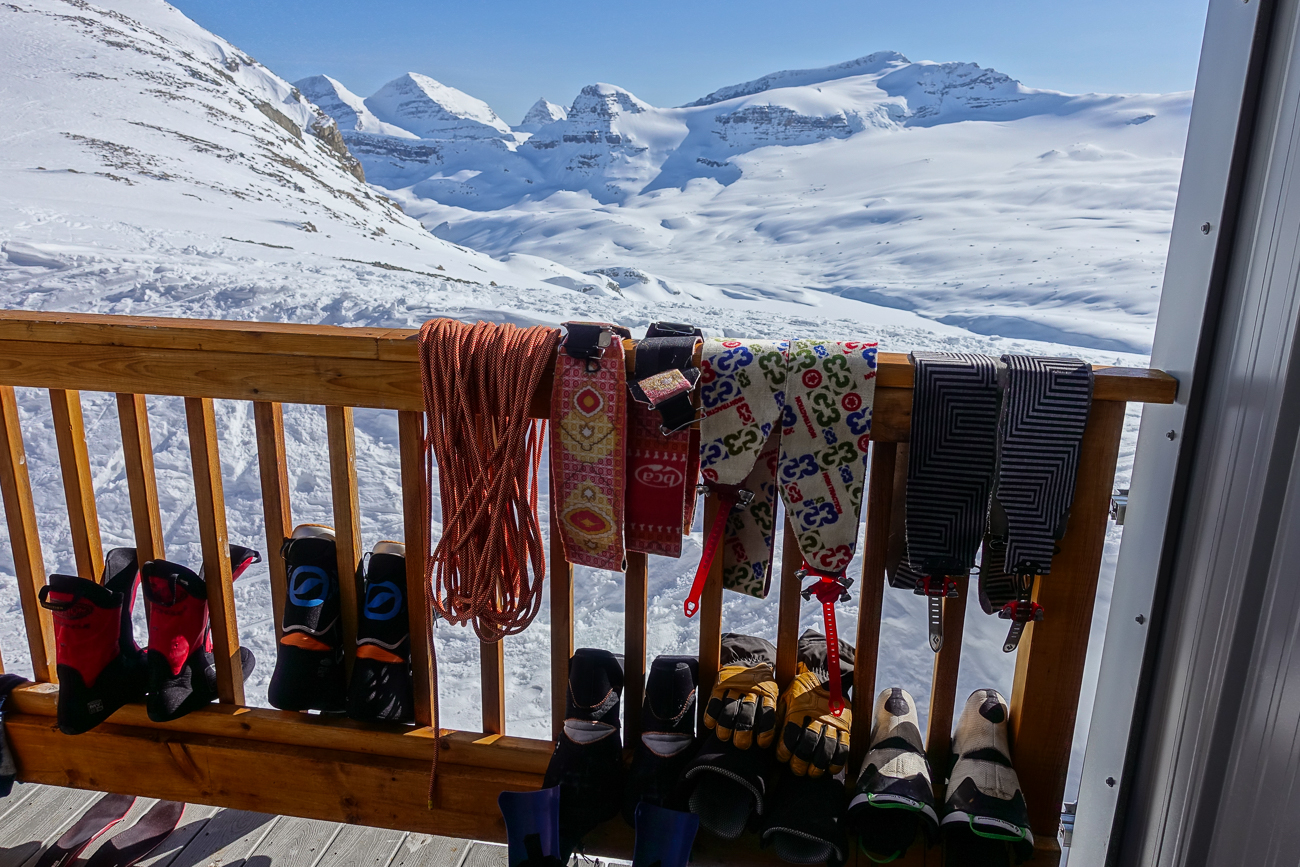
- Breathtaking scenery / big glaciers
- Very reliable snow conditions
- Quick access from Calgary Airport
DIFFICULTY
- 5-8 hours per day on skis
- 14-16 kg / 30-35 lb backpacks
- Glacier travel
- Intermediate skiing ability required
Bow-Yoho Ski Traverse Itinerary
Pre-trip meeting (evening before – optional)
OnTop Mountaineering’s Wilz family will host the pre-trip meeting in Canmore, AB in the late afternoon or early evening before your Bow-Yoho Ski Traverse. Canmore is 1¼ hours from Calgary International Airport, and pick-up can be arranged. For custom trips, we can offer alternative meeting locations and times. During the meeting, we will review the trip itinerary, do an equipment check, and distribute rental equipment (if necessary), food, and group gear. If time allows and everyone is present, we will conduct an avalanche safety exercise in order to expedite departure the next morning.
Day 1: Drive, approach to Bow Hut
The drive along the scenic Trans-Canada Highway from Canmore to Lake Louise and then north on the world-famous Icefields Parkway towards Jasper will take us to Bow Lake (120km / 1.5 hours). After strapping on our skis, our adventure will begin by crossing the frozen Bow Lake – one of the famous postcard images of the Canadian Rockies. After skiing up a trail in the trees and then through a narrow canyon, we will enter a broad, glacier-ringed valley that leads to the final slope below Bow Hut, which is situated at 2,350 m / 7,700 ft. This approach of about 8 km / 5 miles and 400 m / 1,300 ft vertical gain normally takes 3-5 hours, depending on conditions. For the energetic, there may be time left for a few turns above the hut before dinner.
If you live at low elevation you may feel the altitude at Bow Hut. Arriving a day early for a warm up ski tour out of Canmore, Banff, or Lake Louise is not a bad idea!
Day 2: Traverse to the Louise & Richard Guy Hut
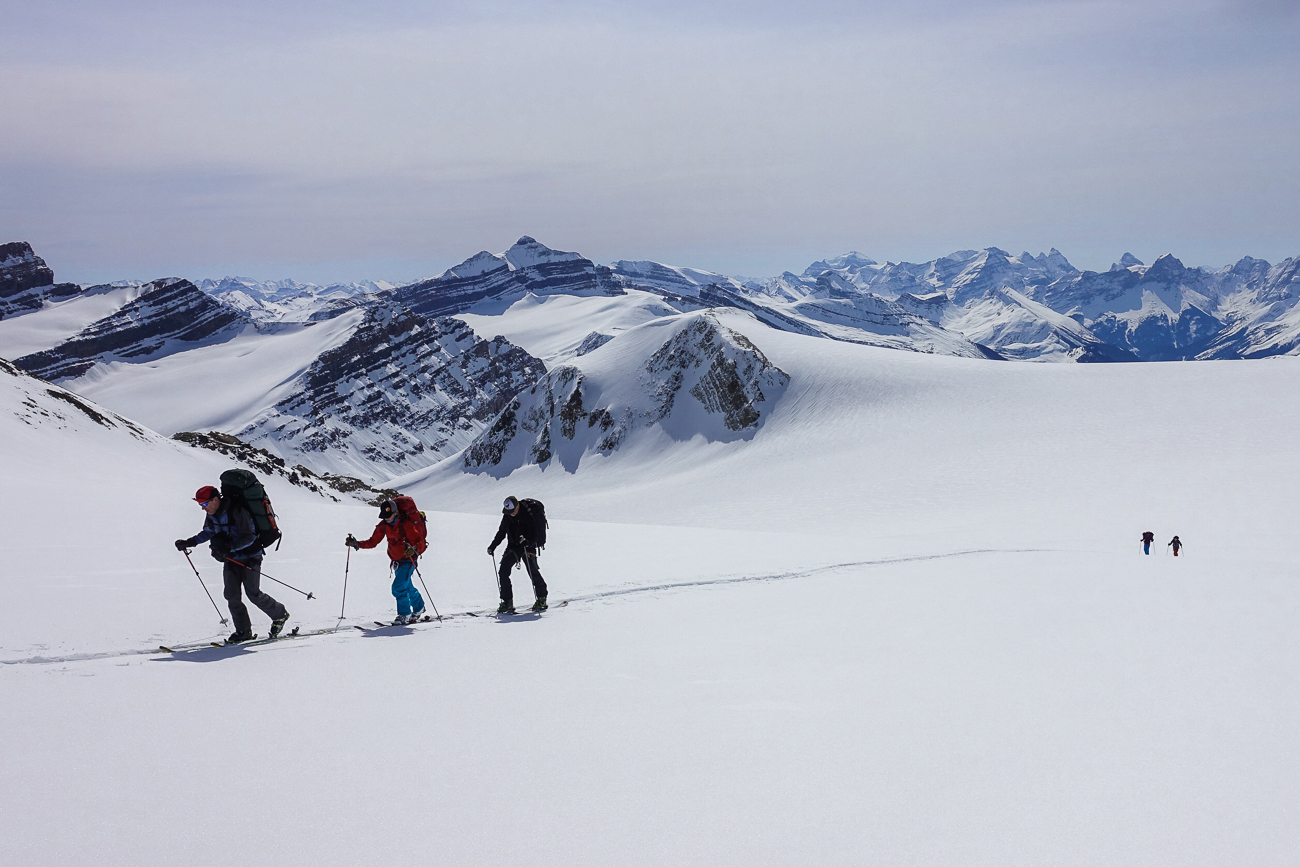
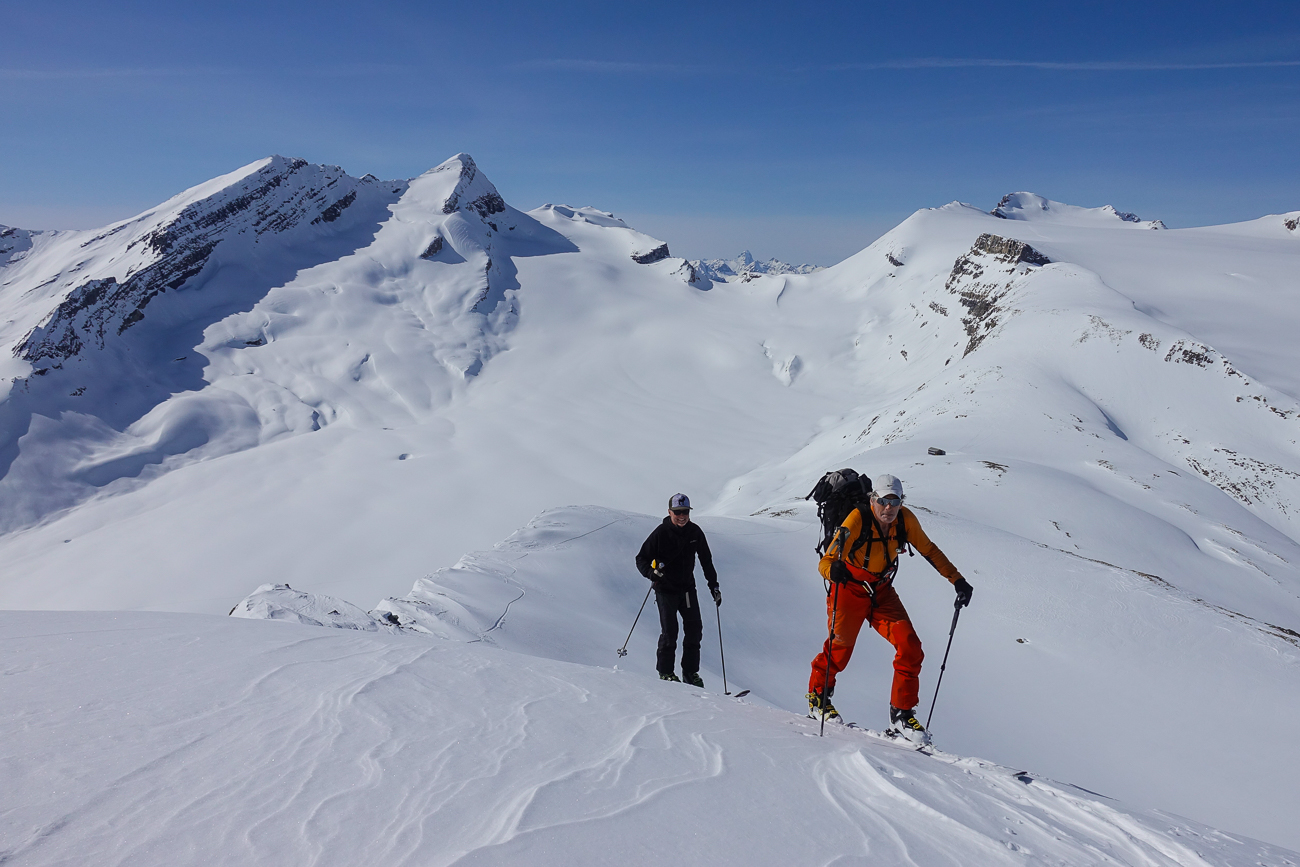
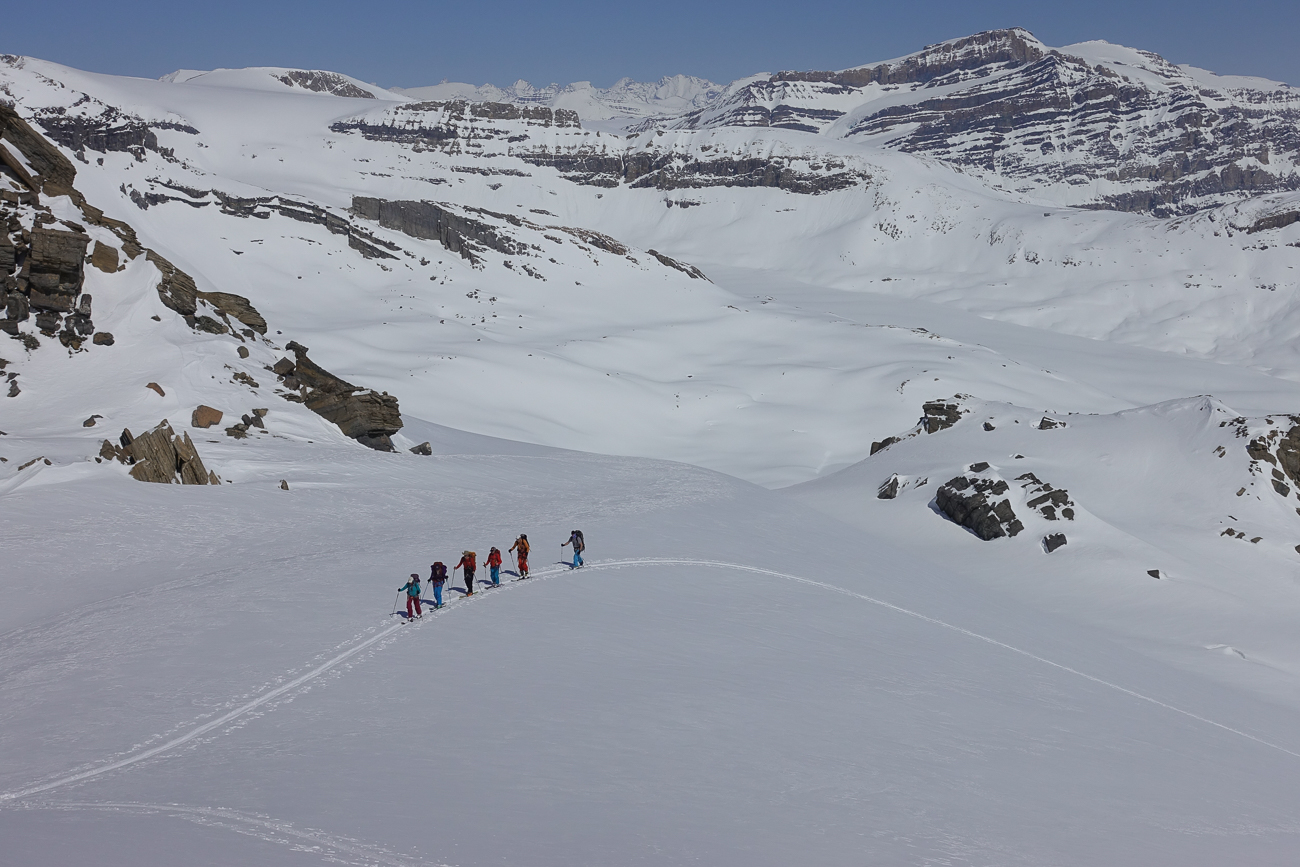
The traverse from Bow Hut to the Guy Hut covers 12 km / 7.5 miles with about 820 m / 2,700 ft of elevation gain. It will be necessary to wear glacier travel harnesses and a rope for much of the 5-7 hours it will take to complete this section of the journey. On a blue-sky day, there is no better place to be than up high on the Wapta Icefield! We will pass between many beautiful peaks and enjoy views of mountains as far as the eye can see. If the weather is poor, we just have to think of it as the grand adventure that it is.
Day 3: Peak bagging and skiing from the Guy Hut
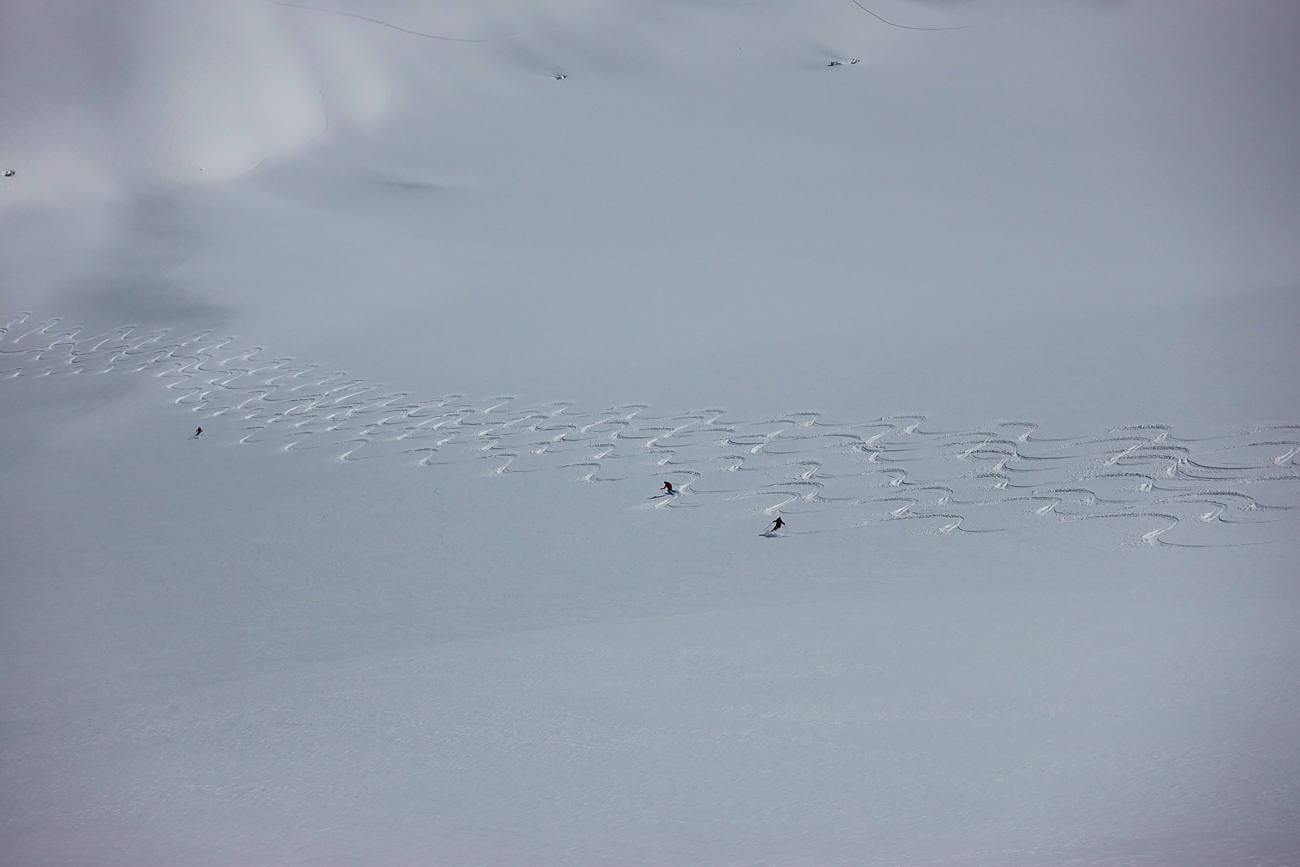
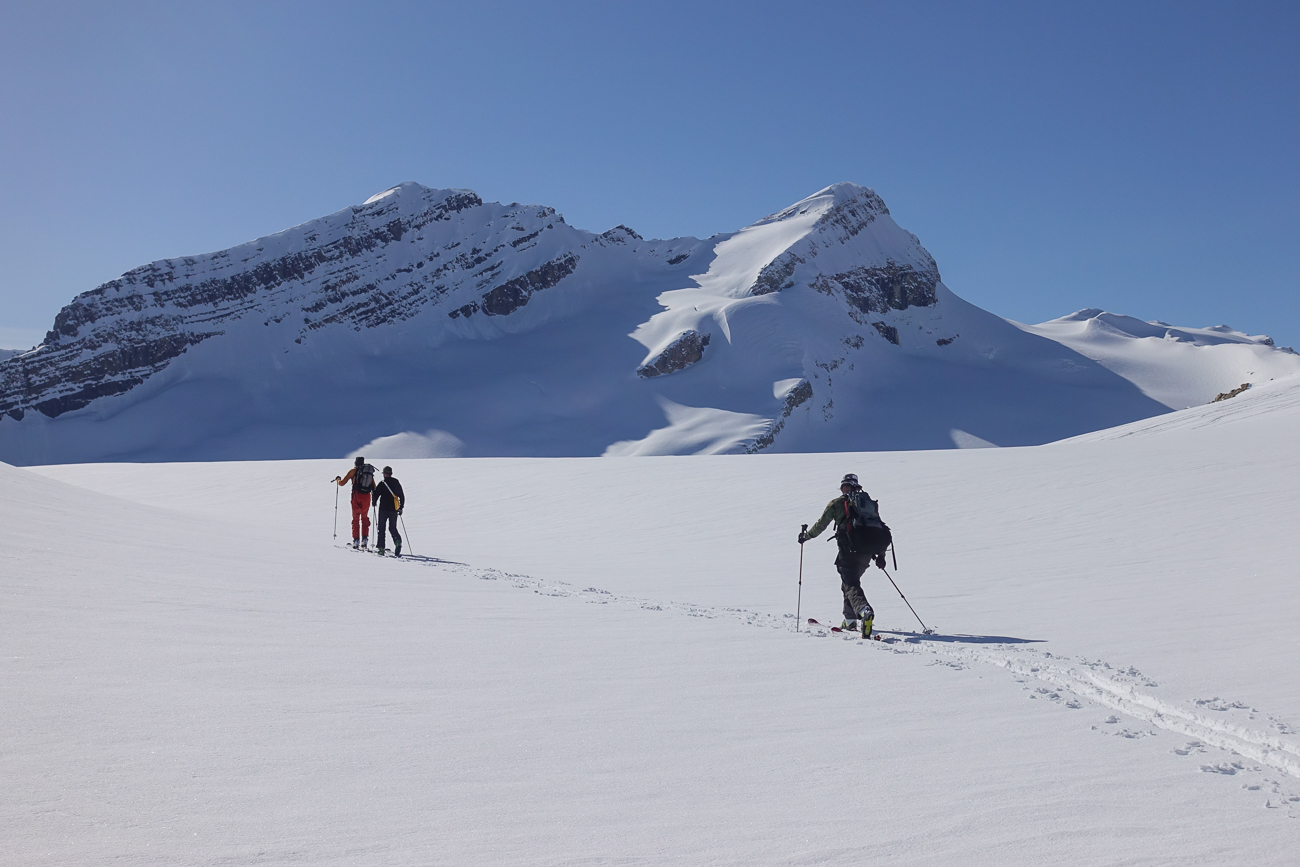
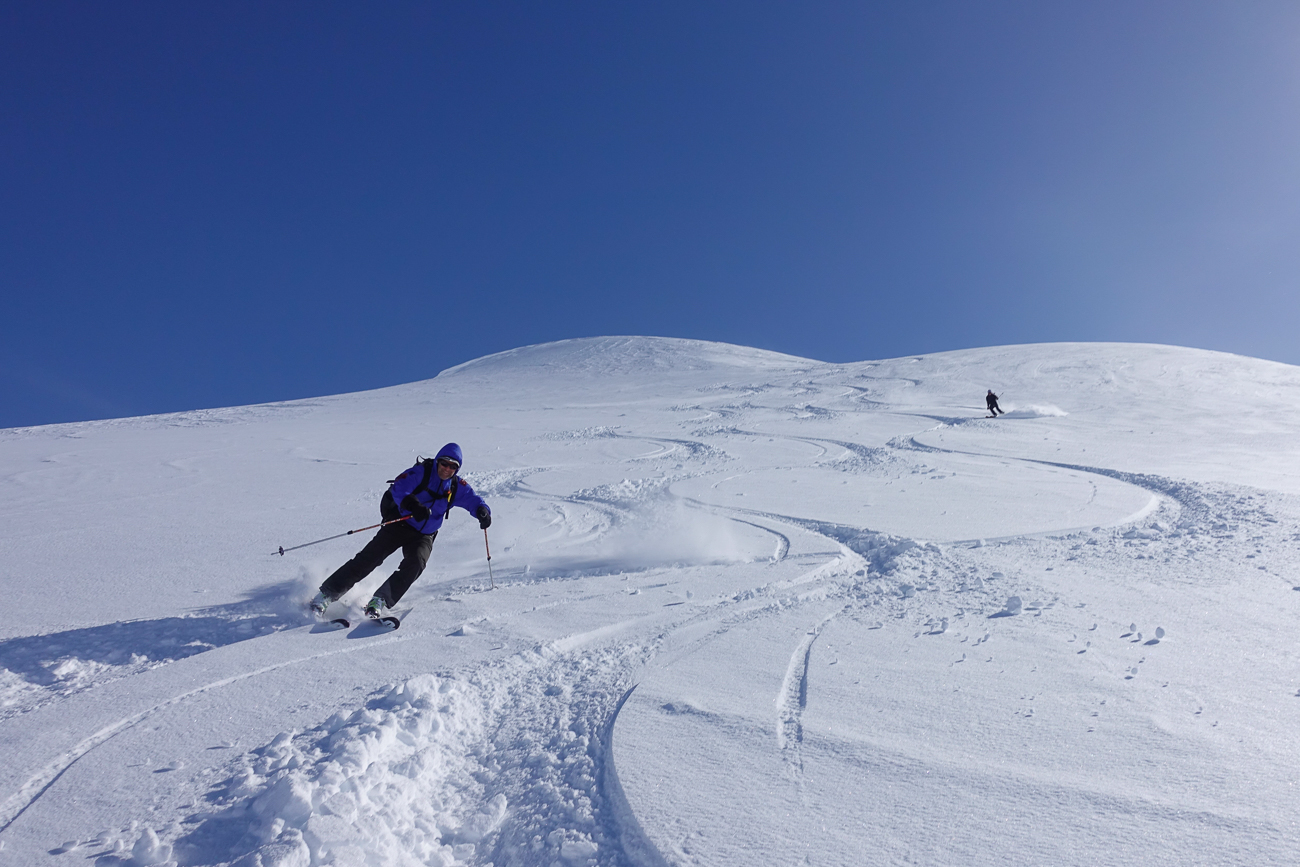
Day 3 will be spent in the area around the brand new, state-of-the-art Guy Hut. Our main objective for the day will be Mont des Poilus (3,166 m / 10,385 ft) – one of the highest peaks in the area. This sought-after ski mountaineering ascent involves skiing to just below the summit and finishing off the last few metres by bootpacking. The unbroken 500 m / 1,650 ft run back to the base normally provides fantastic powder skiing. We can make a second lap or ski another one of the many near-by options if we have the time and energy.
The day will involve a minimum of about 10 km / 6 miles of travel with 800 m / 2,600 ft elevation gain.
Day 4: Traverse from Guy Hut to Stanley Mitchell Hut
If conditions are right, we will descend from the Guy Hut to the des Poilus Glacier, cross it, and ascend the steep 300 m / 1,000 ft slope that leads to Isolated Col. After enjoying fine views of Little Yoho Valley, the Vice President, President, and other beautiful peaks, we will ski a great run towards the valley. If time and conditions allow, we can drop our heavy packs and make a ski ascent of Mt. McArthur, 600 m / 2,000 ft above. After yet another fine summit, a 900 m / 3,000 ft descent will bring us to the historic Stanley Mitchell Hut. If the avalanche conditions or visibility do not allow us to ski over Isolated Col, there is an alternative, more conservative line around Whaleback Mountain. For those who have the energy, we can make some afternoon runs from the Stanley Mitchell Hut.
The day will involve a minimum of 300 m / 1,000 ft of elevation gain over 8 km / 5 miles, more if we make an ascent of Mt. McArthur.
Day 5: Skiing near the Stanley Mitchell Hut
There are many options for excellent skiing and peak bagging around the Stanley Mitchell Hut. If conditions and energy allow, we can try for the Vice President or President. If visibility is poor, there are terrific tree skiing options. The skiing in Little Yoho Valley is some of the best in all of the Canadian Rockies and we are sure not to be disappointed.
Day 6: Stanley Mitchell Hut to the Trans-Canada Highway or Emerald Lake
On Day 6, we will ski out to either the Trans-Canada Highway or Emerald Lake via Emerald Pass or Yoho Pass. Skiing to the Trans-Canada involves losing about 750 m / 2,500 ft of elevation over 23 km / 14.5 miles. The last 16 km / 10 miles are on the summer road that leads to Takakkaw Falls, and this section normally passes by quite quickly. It is a relaxed way to finish a great ski trip! Skiing to Emerald Lake via Emerald Pass or Yoho Pass requires good avalanche conditions, good visibility, and lots of enthusiasm and energy from the group. If we can take one of these exits, it will be a memorable and exciting way to finish the trip.
Inclusions
Included:
- Six days guiding by an IFMGA/ACMG certified Mountain, Ski and/or Apprentice Ski Guide
- five nights lodging in Alpine Club of Canada huts
- five breakfasts and 3-course dinners (professionally prepped and packed, lightweight)
- Any special meal requests will incur an additional $10 / day
- use of avalanche safety and glacier equipment (harness, rope)
- National Park wilderness overnight fees
- Pre-trip meeting
- All guide expenses
Not Included:
- Transport from Canmore, Banff or Lake Louise to trailhead and back
- Pre and post-trip lodging in Canmore
- lunches and snacks
- Any additional cost due to changes in the itinerary, may they be caused by weather, mountain/avalanche conditions or personal preferences
- Insurance
Add-On Services ($):
- Equipment Rental (sleeping bag + liner, rucksack, other items by inquiry)
Transportation
Meeting Point
Your pre-trip meeting will be hosted by the Wilz family in Canmore, AB on the evening before your Bow-Yoho Ski Traverse.
Closest Airport / Transport options
Calgary International Airport is located about 1.25 hrs from our base in Canmore AB, 1.5 hrs from Banff AB and 2 hrs from Lake Louise.
There are several private shuttle services providing hourly transport from the Calgary airport to the Bow Valley – Canmore, Banff and Lake Louise.
Driving times from the trail head at Bow Lake: To Calgary = 2.15 hrs, Canmore 1.15 hrs, Banff 1 hrs, Lake Louise 20min.
For Airport shuttle services; Banffairporter.com
Rental cars and taxis are also available in Calgary, Banff or Canmore:
- Canmore: Enterprise Rent-A-Car – Devil’s Gap Expedition – National Car Rental
- Banff: Budget Rent-A-Car – Hertz Rent A Car
Canmore Taxi companies:
- Canmore Taxis – Phone: 587-361-2882
- APEX Cabs – Phone: 403-609-0030
- Quick Cab – Phone: 403-679-9999
Banff Taxi companies:
- Taxi Taxi – Phone: 403-762-0000
- Banff Transportation Group Ltd – Phone: 403-762-8400
Bow – Yoho Traverse Private Trip Pricing
For private groups, we can make almost any trip duration and departure date work with adequate notice time for the entire season December – May.
Pricing:
We can offer the following pricing depending on group size assuming 6 day / 5 night program as our standard trip. Shorter or longer durations will be pro-rated:
7 participants 15% discount of the advertised per person price
6 participants 10% discount
5 participants: Our advertised trip price
4 participants: 10% premium in addition to our advertised price per person
3 participants: 40% premium
2 participants: 60% premium
Custom trips Itinerary Options:
Longer Bow Yoho Traverse Durations or more time at Guy or Stanley Mitchell Huts:
Adding a day or two is a popular itinerary option. Most commonly we add a day at the Guy Hut which we believe is the best hut of the 6 huts in the Wapta / Yoho system, due to remoteness, stunning location and endless day touring opportunities from there. Often there is more snow west of the Rockies Divide around the Stanley Mitchell and Guy Huts due to the predominant westerly weather flow patterns in the Canadian Rockies.
Very strong and fit groups could also opt to access the the Guy Hut via Peyto Hut (requiring a much longer first day than the Bow Hut approach) or tackle the long haul from Bow Lake to the Guy Hut in one day by skipping the Bow Hut in order to spend more time powder skiing on day trips with a light pack.
Lastly, an option often chosen for last minute bookings when hut availability or avalanche hazard dictates the itinerary, it is also possible to reverse the itinerary. This involves an 8hrs, 25 km long, mostly flat trek to the Stanley Mitchell Hut through the Yoho Valley. In times of high hazard we are forced to decend that way but we try our best to avoid it with more interesting exit routes via Iceline Trail or Emerald Pass, which offer pretty exciting and long ski descents to Emerald Lake.
Shorter Bow Yoho Traverse Durations:
Some groups shorten the Bow yoho Traverse to a 5 day / 4 night trip by cutting out either the first night at the Bow Hut or the last night at the Stanley Mitchell Hut. We don’t recommend shorter trip durations because you will likely hate not taking advantage of the awesome powderskiing and soaking in more of the scenery of the remote areas in Yoho National Park that we will be travelling through.
Stanley Mitchell or Guy Hut as base lodges for ski touring weeks:
If your focus is on skiing and not “traversing” especially the Stanley Mitchell Hut has a long tradition as a base lodge for ski touring weeks. We can ease the load on the initial day by having two porters come and help carry supplies. Unfortunately, while the Guy Hut is easily as suited for a week long trip, the remote, glaciated location makes portering supplies very costly.
Gear List
Bow-Yoho Ski Traverse Gear List as Downloadable .PDF
Please download a PDF copy to use as a checklist when preparing for your trip.
Technical Equipment
Bring the following, or rent it (see ‘Trip Info Links’ at the bottom of the page):
- Alpine touring (or telemark*) skis and ski boots
- Collapsible, lightweight ski poles
- Climbing skins (stick-on), fitted to your skis
- Ski crampons (required for trips in March, April, and May)
- Large backpack (50-70 liters). You will also have to carry some group gear.
*Only bring telemark skis if you are an advanced telemark skier with backcountry experience.
If you do not have one or more of the following items, you can rent them from the listed retailers or OnTop can provide them. Please book in advance.
- Digital, 3-antenna avalanche transceiver
- Lightweight snow shovel
- Avalanche probe (two to three meters long)
- Harness for glacier travel
- One triple-action locking carabiner or two conventional locking carabiners
Bring the following:
- Crevasse rescue equipment, if you are familiar with it. (Prusik cords, webbing, pulleys, auto-locking device). Your guide will bring a full set.
- Repair kit and Leatherman (can be shared between several people)
- Spare parts specific to your equipment
Clothing
Temperatures in the Canadian Rockies vary hugely. Between December and February, temperatures can be well below 0°C during the day and drop as low as –30°C overnight. Between March and May, it can be above freezing during the day with overnight lows not normally going below –10°C. Having several clothing layering options is important.
- Wind and waterproof shell jacket with hood (Gore-Tex or similar)
- Wind and waterproof over-pants (Gore-Tex or similar)
- Warm pants (eg. lined Schoeller fabric)
- Thick fleece or wool pullover, or PrimaLoft jacket
- Medium weight fleece shirt
- Thin synthetic or wool underwear, top and bottoms
- Two pairs of gloves (lightweight and heavier weight)
- Scarf or neck gaiter (eg. Buff)
- Socks (synthetic or wool, thick outer and thin liners)
- Wool or fleece hat that covers your ears
- Gaiters that fit over your ski boot (unless pants seal tightly to your boots)
- Sun hat, preferably with a wide rim
- Bandana (optional)
Around the hut
- Spare underwear and socks
- Light down jacket or vest
- Three-season sleeping bag with stuff sack. Sleeping rooms are unheated
- Earplugs (optional)
- Light hut slippers or Crocs (optional – socks or ski boot liners work too)
- Toiletries (keep to a bare minimum – the huts have minimal washing facilities)
Other items
- Sunglasses with high UV protection
- Ski goggles with high UV protection
- Sunscreen and lip protection with high SPF
- One-litre water bottle with an insulator. Water bladders not recommended
- Thermos (optional)
- Headlamp with spare battery
- Lunch and snacks (eg. sandwiches, candy bars, dried fruit, nuts, etc.)
- Personal first aid kit and other needs (eg. blister kit, prescription medicine, anti-inflammatory, contact lenses, prescription glasses, etc.)
- Pocket knife (optional)
- Health and travel insurance documents
- Light stuff sacs or Ziploc bags to keep your backpack organized and important items dry (optional)
- Rain cover specific to your pack, or large plastic bag
- Camera, spare batteries (optional)
- Compass, maps, GPS (optional)
- Ski wax / skin wax (optional)
- Hand sanitizer or sanitary hand wipes
FAQ
Do I need to sign a Release of Liability & Assumption of Risk Agreement (a.ka. liability waiver)?
Yes, you do. Mountaineering, skiing, climbing, hiking, via ferrata and all other wilderness and adventure travel activities are inherently risky with potential for injuries or even death.
It is very important to us that you are aware of those risks before you start the booking process, which includes filling out a booking form and paying a deposit.
With signing the liability waiver, you confirm that you understand the potential risks and hazards, and are willing to accept the risks, which includes giving up legal rights you may have.
This would also be the time to ask questions or address concerns before you book.
For your reference here is a link to our Liability Waiver. Our booking terms & cancellation policy with more details can be found here
Trip-related Questions:
What happens if the avalanche hazard is high during the traverse?
One of the strengths of the Bow-Yoho ski traverse is that it can still usually be done when the avalanche hazard is considerable, and at times even when it’s high. The biggest area of concern is getting over Isolated Col, and we can take a more conservative (but longer) route around the Whaleback in order to avoid the Col.
Can the Bow-Yoho Traverse be done on a splitboard?
Only for very experienced and fit split boarders who are able to descend with a heavy traverse pack and switch to skiing mode for descents in low angle terrain with quick transitions. If high avalanche hazard precludes us from descending to Emerald Lake on the last day involves 23 km ski out to the Trans-Canada Highway with 16km on a low-angled, ondulating summer road.
How easily can the Bow-Yoho Traverse be aborted?
One of the reasons the Bow-Yoho Traverse is considered the “big brother” of the Wapta Traverse is because it is more committing. Once at the Guy Hut, retreat involves either returning via the Bow Hut or descending and skiing out the Yoho Valley. Both options can take as long as 8-10 hours.
Do you need a ski helmet for the Bow-Yoho ski traverse?
Bringing a ski helmet on a ski traverse has pros and cons. Helmets offer valuable protection against head trauma, however, there are relatively few things you can hit on the Bow-Yoho traverse. The skiing is almost all above treeline except for about two hours of the descent on the final day. Relative to a ski resort there are few other skiers you could possibly collide with (but it has been done!) There can be rocks barely hidden by snow in wind scoured areas or in times of low coverage. Lastly, a helmet could offer head protection in an avalanche.
That all being said, the likelihood of needing one is relatively small. It is cumbersome to carry a helmet along with all the other stuff you need to carry on the Bow-Yoho traverse, and helmets add another item to the list of things to do when transitioning from climbing to descending. In the end, it’s up to you whether you want to bring a helmet or not.
How is the Bow-Yoho Ski Traverse different from other wilderness traverses like Bugaboos to Rogers Pass?
The Bow-Yoho Ski Traverse is one of the best hut-to-hut traverses in North America and a perfect next step after the Wapta Traverse. The other wilderness traverses (Bugaboos to Rogers Pass, Monashees and Selkirk Traverses) are probably amongst the wildest ski adventures one can have anywhere in the world. They involve bigger backpacks, a higher risk to get shut down by weather and avalanche hazard, and higher costs due to the necessary helicopter access.
In more detail the main differences are:
Terrain: The Bow-Yoho Ski Traverse travels almost exclusively above tree line and on glaciated terrain except for the first and last couple of hours of the traverse. On most other wilderness traverses you end up traveling below tree line quite a bit and usually try to camp in the trees to be able to dry out equipment at a fire and hide from wind and weather.
Skiing and snow quality: The Bow-Yoho Ski Traverse usually has colder weather than the other wilderness traverses as it is located in the Rockies, which are influenced by the continental climate. The snow can be light powder or wind-packed. The ski terrain is a bit steeper than on the Wapta Traverse, but similarly, most of the summits en route offer steeper, fun skiing with light packs. Generally, one must ski steeper terrain with a heavy pack throughout most of the wilderness traverses. This terrain can be difficult to negotiate in bad weather and at times of elevated avalanche hazard. The snow quality can range daily from isothermic to powder depending on the elevation change.
Access: The Bow-Yoho Ski Traverse is just as easy to access as the Wapta Traverse. The starting point can be reached by car from the Calgary airport within 2.5 hours while the other wilderness traverses require 3-5 hours of driving followed by a helicopter ride of 15-30 minutes.
Other users: Some of the wilderness traverses travel through heli-ski terrain, however, most heli-skiing operations shut down in early April (except CMH Bugaboos, which runs until early May). The core season for the wilderness traverses is from early April to early May. The Bow-Yoho Traverse is in Banff and Yoho National Parks and therefore no mechanized ski access is allowed. Capacity at the huts is between just 18 and 30 people. We may meet one or two other groups during the day, however, given the size of the terrain and the many options for summits, we may not meet anyone else until we arrive at the hut in the afternoons.
Summits: On the Bow-Yoho Ski Traverse, there may be opportunities for us to drop our heavy packs and climb summits along the way. Summit attempts are less common during the wilderness traverses due to the difficulty of the peaks, the additional time required, and the necessity to focus on mileage.
Avalanche safety and the likelihood to finish the entire traverse: The Bow-Yoho Ski Traverse can usually be undertaken in inclement weather with considerable avalanche hazard. The wilderness traverses require good weather and low to moderate avalanche hazard in order to get through the traverse safely.
Transport to and from the trailhead: Transport is not included in your trip price, however, we can arrange it for you. If you ride with the guide, you can pay the guide in cash directly for 0.55c/km. If riding with the guide isn’t an option, then OnTop can help organize a shuttle from Canmore, Banff, or Lake Louise to and from the trailhead. Please email us for details.
Best season for the Bow- Yoho Ski Traverse
Early March to end of April is definitely the prime season for the Wapta Icefields ski traverse. That being said, we had lots of successful Bow Yoho Ski traverses in February and all the way through the month of May. However, our favorite hut, the Guy Hut operates on a winter-permit only which ends on April 30 (apparently the day when winter is finished in the eyes of regulators with Parks Canada) and we have to skip the Guy Huy en route to Stanley Mitchell Hut, which makes for a very long day. The reason why the spring is favoured is because the weather tends to be better and lacking the dreaded deep freeze periods of the winter, the snow is usually well settled and provides good bridging across gaping crevasses and the avalanche hazard tends to be low to moderate, which matters in the big and complex terrain we will be travelling.
Is the Bow – Yoho Traverse a Powder Skiing Trip?
It very well can be but Do NOT expect a powder skiing trip especially for the favored spring departures – it’s a ski mountaineering adventure with a sizeable backpack and all sorts of hardship and an enormous level of uncertainty in terms of skiing and weather conditions. If skiing conditions are good, we try to incorporate some extra “powder runs”, often in the pm with a lighter backpack having arrived at the destination hut. Also, since we are doubling up on two very remote and attractive ski touring huts, the Stanley Mitchell and the Guy Hut, the Bow – Yoho Traverse offers more options for powder skiing relative to the Wapta ski traverse where we move on to another hut every day (except custom trips). However, if you are looking for a more predicatable powder skiing experience, we can point you in the right direction – heli access ski touring lodges, heli-skiing or heli-assisted ski touring at a higher monetary input and usually lower adventure component. Also, valley-based touring trips give us more options to take you to the best places for powder skiing at the time.
Trip Details
Meeting point
Your pre-trip meeting will be hosted by the Wilz family in Canmore, AB the evening before your ski traverse.
Best season, weather, and temperatures
The Canadian Rockies Icefields tend to have a cold micro-climate in an area that can already be considered colder than most ski touring areas in North America with temperatures between 0C (32F) to -25 (-13F).
The best season for the Bow-Yoho Traverse is mid-March through the end of April when the weather tends to be more stable, temperatures are warmer, the snowpack is better settled and crevasses are more effectively bridged than in early season. The risk of not being able to finish the entire traverse or having to make adjustments to the itinerary is higher in early season (January – mid-March) than in late season (mid-March – mid-May).
Hotels / Lodging we can recommend you in Canmore, AB:
Medical/Rescue and Trip Cancellation Insurance
We strongly recommend the purchase of a travel insurance package that does cover adventure travel. Common policies sold by travel agents or policies included in your credit card contract tend to exclude “mountaineering” if you read through the fine print. We recommend an adventure travel policy on our website at http://ontopmountaineering.com/travel-insurance/ which our clients had good experiences with in the past. *NEW: we now recommend including covid-19/pandemic coverage with your insurance policy.
Can I Do It?
The Bow-Yoho Ski Traverse is a strenuous backcountry ski tour on mostly glaciated terrain using alpine touring skis or sturdy telemark equipment. You must be able to ski safely and in control at all times while wearing a heavy (14-16 kg / 30-35 lb) backpack.
Depending on the conditions, we might need to ski roped together on both ascents and descents.
You need to be in good physical and mental condition, ready to be on your feet for up to eight hours on some of the days. If in doubt whether you have the required skills or fitness, give us a call!
On a custom basis, we also offer a shorter itinerary that does not allow for extra days at the Guy and/or Stanley Mitchell huts.
Feedback (from our Wapta Ski Traverse)
References of prior guests: We will gladly put potential clients in touch with previous participants of each trip in order for interested guests to get more personalized references and their questions answered from a more objective point of view than what our office could provide.
“Guide: Great. Mike and Jen were approachable and full of knowledge and experience and were totally helpful. Mike’s judgement allowed us to safely complete the WAPTA – hoorah!
Itinerary: Spot on.
Lodging/Food quantity and quality: The Huts are in a great location and much better than camping.
10/10″ Guy S., Australia
“The Wapta trip was pretty much everything I hoped it would be (except for the blisters); challenging, scenic and enlightening. Overall, a memorable experience. I’d definitely recommend it to someone who is looking to complete a real journey through the mountains.
Guide: Mike was excellent. Very cautious and set a reasonable pace on the hill. He was happy to share his knowledge and was a great leader throughout.
Itinerary: The Wapta is what it is – a traverse and I appreciate that is the overall objective – decent downhill skiing is only a bonus so I wasn’t bothered that we didn’t get too much of that on this route. We didn’t seem to have the time or weather to make as many of the side trips as the online itinerary suggests. Reflecting on that itinerary, seems to me you’d have to have a very fast group and perfect conditions to get it all done.
I am definitely keen to do more trips with OnTop. If I have any friends looking for a genuine Canadian Rockies experience I will be strongly recommending you. Say an 8/9 out of 10.” Steve T., Hong Kong
“Thanks so much. It was a wonderful trip. Jordy and Leanne did a fantastic job. I really enjoyed them and the other guests. Food was great. Thanks for making it happen. I would definitely recommend On top. 10/10! ”
—Eric S., ID, USA
“Dave’s performance was Excellent. Dave clearly knows his stuff with respect to both the technical aspects of his job, and how to work with people. He is one of the most capable leaders, back country or otherwise, that I have had the pleasure to engage with in the past 30 years or so. Trip Organization and communication was generally excellent and no complaints.
One suggestion: let people know they may be carrying up to 50-60 lbs of stuff at some point in the trip. It wasn’t a problem for me (except for all the huffing and puffing) as I have been training for activities like this, but others may be in for a rude surprise.Itinerary was perfect.Lodging and Food quality was Excellent. Thanks for arranging the night in the Coast for me. The ‘meat-etarian’ in me was well satisfied! 10/10. Already bragging about you to others.”
—Richard E., BC, Canada
2026 SCHEDULED DEPARTURES
Mar. 09 – 14*
Mar. 30 – Apr 4 – sold out (waitlist)
Apr. 06 – 11 – sold out (waitlist)
Apr. 13- 18 – sold out (waitlist)
Apr. 20 – 25 – sold out (waitlist)
Apr 25 – 30*
* dates that still have availability
GROUP TRIP SIZE
1-6 Clients: 1 Guide
CUSTOM TRIP DEPARTURES
Custom trips at any time from February 2026 to April 30 2026!
For details click “Custom Trips” Tab
TRIP INCLUSIONS
Included:
- Certified guide, guide expenses
- 5 x ACC hut nights
- 5 x dinners, breakfasts
- Use of glacier and avalanche safety gear
- Parks Canada wilderness fee
Not included:
- Transport to trailheads
- Rental of ski equipment
- Lunches and snacks
- Any additional costs due to changes in the itinerary, may they be caused by weather, mountain/avalanche conditions, or personal preference.
Add-Ons:
- Transport ($)
- rentals ($)
For a full list of services included, not included, and add-ons, please select our “Trip Inclusions” Tab.


SIMILAR TRIPS
Wapta Icefield Ski Traverse
Canadian Wilderness Ski Traverses
Rogers Pass ski touring
Fairy Meadow ski touring
Haute Route Ski Traverse (European Alps)